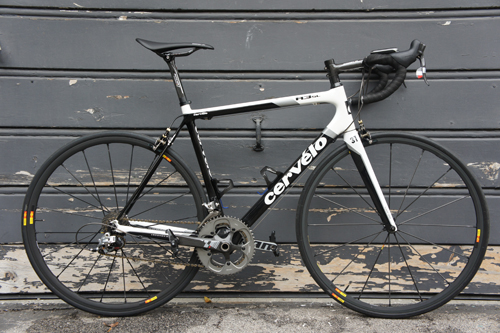

While in San Francisco over the Thanksgiving break, I was able to spend five hours being fitted to my bicycle at 3D Bikefit. Before getting into the details of the fit, I should mention that previous to this, I had only been fit the old school way. This meant measuring tapes, protractors, and a weight on a string. The old school way seemed to work, but I still had issues that needed sorting, such as a very stiff neck and shoulders when riding over 50 miles. At 3D Bikefit, I was given the Body Geometry Video Analysis Fit. It is typically a 3 to 4 hour fit, but mine took about 5 hours under the watch of Ryan Moore. It all starts with an interview asking what works and doesn’t work for you on the bike. Then, basic measurements of your body are taken. Once this is completed, a video is taken of you on the bike. You are on a lazy susan of sorts, that allows you to be turned around for full coverage by the cameras. The video streams live to monitors front and rear, so you are able to watch yourself. The video is taped, allowing the fitter to check angles on the computer. This is how they start to adjust everything on the bike. The goal is to make you as comfortable on the bike as possible, while increasing your power. It seemed like a tall order, but Ryan was confident it could be accomplished. Right off the bat it was determined I was sitting way too far back in relation to the cranks. A zero setback seatpost was installed. The saddle was then slammed forward to accomplish the proper position over the cranks. Next up, the 100mm stem needed to be replaced by a 130mm stem to give me the proper reach. I am making it sound as if this is all happening fast, but keep in mind that the measurements and video analysis take time, and Ryan fretted over the smallest of measurements. The saddle was adjusted endlessly, as was the saddle height. This process took the majority of time. An adjustment, then more video, another adjustment, more video, etc. Time consuming, yes, but worth it in the end. Another emphasis is placed on the shoes and cleat positions. Again, from the video, Ryan adjusted both. I now have new insoles, with a shim in my left shoe. All this work added up to a more relaxed position on the bike while also gaining a power advantage. My back is now straight, there is less pressure on my arms and shoulders, and I feel better all the way around. The photos above show the difference in position on my Cervelo, top being before, and after below. It’s a dramatic difference, and one that has improved the quality of my riding. 3D Bikefit are expert at making you the rider you have always wanted to be, fast and powerful, yet incredibly comfortable.

oh man i need this so bad! I feel like a wreck after riding. my shoulders and neck get racked up. Wrists kill me while riding.. etc… does something like this exist in LA? Sounds like a great investment.